How to convert Site Templates into Component Templates
In some cases, you may want to use a specific Site Template (with all revisions you have done so far) in another instance of the azeti Engine (e.g. migrating the site configuration to another instance).
Converting a Site Template to a Component allows to reuse it globally for your installations. The conversion can be done quickly by altering the XML of the Site Template and declaring it to become a Component template. After an upload it will be recognized as a Component.
Check out the article /wiki/spaces/SSCL/pages/47775864 which explains tech differences between Site Templates and Components.
Step-by-step guide
- Log into the Dashboard. Go to Config/Provisioning → Sensor Templates → Site Templates and click on edit next to the location you wish to edit.
- Click on the Dropdown Menu of 'Show as XML' (right arrow next to the button), which is right next to the red 'Toggle SU / Normal Mode' button, and choose 'with server nodes'. The XML file of the Site Template will appear.
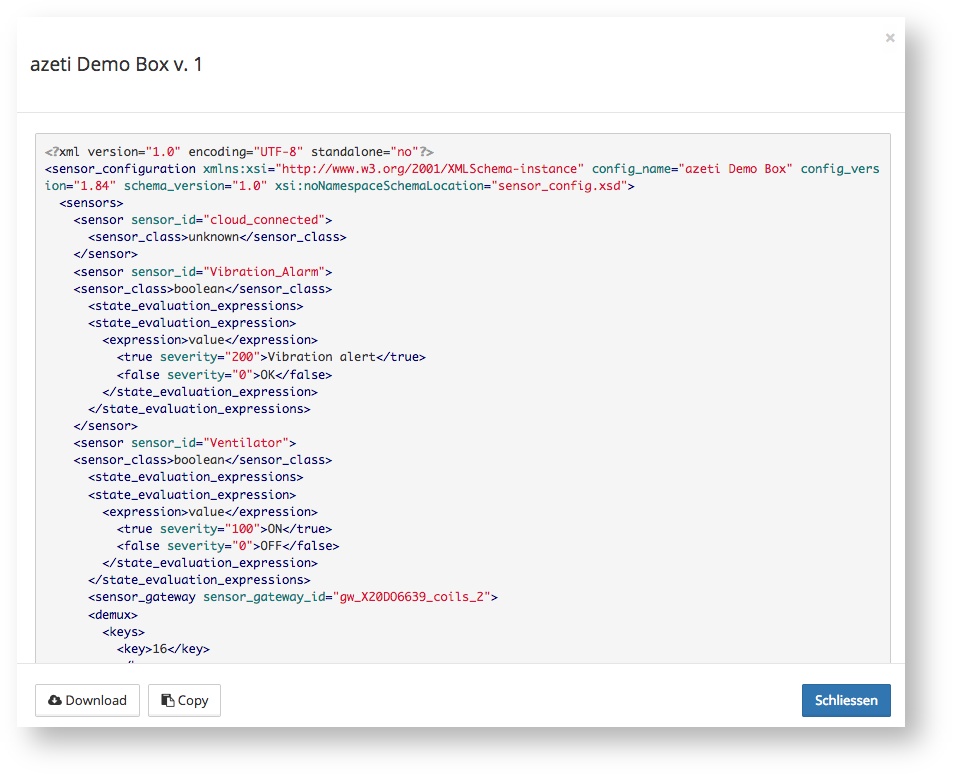
- Click on the 'Download' button and save the XML file.
- In the XML file, two sections have to be edited in order to convert the Site Template to a Component Template. The following Code Blocks will provide an example of what needs to be changed.
Beginning of the XML
<?xml version="1.0" encoding="UTF-8" standalone="no"?>
<sensor_configuration xmlns:xsi="http://www.w3.org/2001/XMLSchema-instance"
config_name="azeti Demo Box" config_version="1.84" schema_version="1.0"
xsi:noNamespaceSchemaLocation="sensor_config.xsd">
  <sensors>
    <sensor sensor_id="cloud_connected">
      <sensor_class>unknown</sensor_class>
    </sensor>
In the Code Block above (Site Template), lines 2, 3 and 4 have to be edited. The following Code Block (Component Template) shows the changes in line 2, 3, 4 and 5.
<?xml version="1.0" encoding="UTF-8" standalone="no">
<component_template config_version="1.0" schema_version="1.0">
<description>azeti Demo Box</description>
<vendor>azeti</vendor>
<version>1</version>
  <sensors>
    <sensor sensor_id="cloud_connected">
      <sensor_class>unknown</sensor_class>
    </sensor>
End of the XML
As mentioned before, also a slight change at the end of the XML file is necessary.
0 or 1" sensor_id="Chute_Check" value_type="string"/>
            </result_list>
          </false>
        </condition>
      </conditions>
    </rule>
  </ac_rules>
</sensor_configuration>
Only the last line (1104) of the Site Template has to be changed. The change is visible in the Code Block below at the last line.
0 or 1" sensor_id="Chute_Check" value_type="string"/>
            </result_list>
          </false>
        </condition>
      </conditions>
    </rule>
  </ac_rules>
</component_template>
5. Save the changes and upload the Template as a Component Template at Config/Provisioning → Sensor Templates → Component Templates
Related articles