Sensor Templates are XML files, containing the complete configuration of sensors and I/O devices, but it can also contain triggerable actions and predefined rules. This How-To will show you, how to upload such a template into the Dashboard.
Step-by-step guide
- Log into the azeti Control Panel
- Go to Config/Provisioning → Sensor Templates → Component Templates
Click on Add and browse for the template (XML format) you wish to upload.
Expand title Example of a Component Template <?xml version="1.0" ?>
<component_template config_version="1" schema_version="1.0">
<description>Moxa E1240 AI</description>
<vendor>Moxa</vendor>
<version>1</version>
<class>AI Module</class>
<sensors>
<sensor sensor_id="AI_0">
<sensor_class>unknown</sensor_class>
<sensor_gateway sensor_gateway_id="gw_MOXA-1240-Inputs">
<demux>
<keys>
<key>1</key>
</keys>
</demux>
</sensor_gateway>
</sensor>
<sensor sensor_id="AI_1">
<sensor_class>unknown</sensor_class>
<sensor_gateway sensor_gateway_id="gw_MOXA-1240-Inputs">
<demux>
<keys>
<key>2</key>
</keys>
</demux>
</sensor_gateway>
</sensor>
<devices>
<device device_id="MOXA-1240">
<modbus_device pdu_addressing="false">
<modbus_tcp>
<address>10.0.0.212</address>
<port>502</port>
<slave_address>1</slave_address>
</modbus_tcp>
</modbus_device>
<sensor_gateways>
<sensor_gateway sensor_gateway_id="gw_MOXA-1240-Inputs" publish_strategy="always">
<modbus>
<modbus_register>
<register_address>1</register_address>
<register_count>8</register_count>
<block_type>analog_inputs</block_type>
</modbus_register>
<scheduling>
<polling_interval>30000</polling_interval>
<error_handling>
<retry retry_algorithm="linear"/>
</error_handling>
</scheduling>
</modbus>
</sensor_gateway>
</sensor_gateways>
</device>
</devices>
</component_template>Info In production environments a Component Template should only have the configuration for one sensor or I/O device.
Multiple Component Templates will be merged together into one Component Instance.
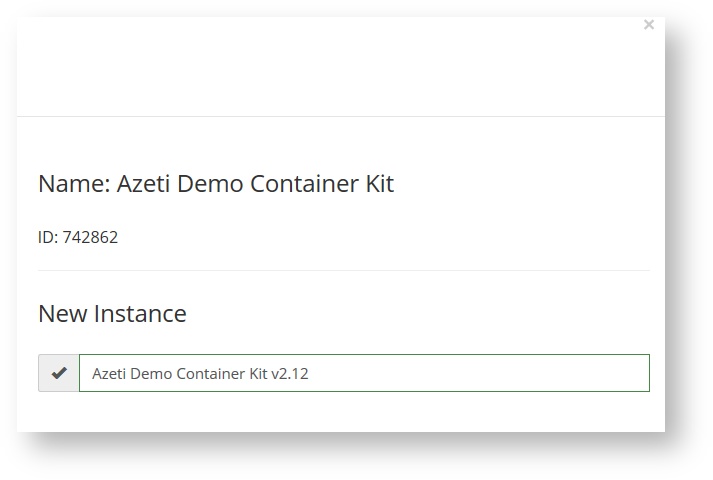
- Click on Config/Provisioning →Sensor Templates → Component Instance and click Add to create a new Component Instance
- Select the Component Template you would like to use
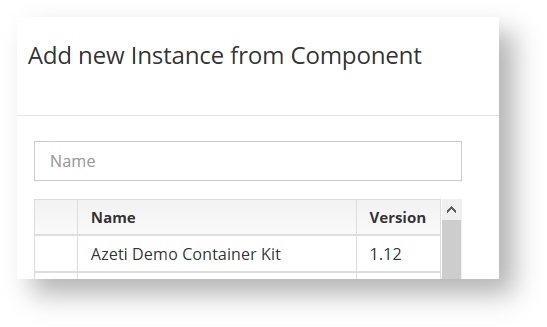
- Give the new Component Instance a name
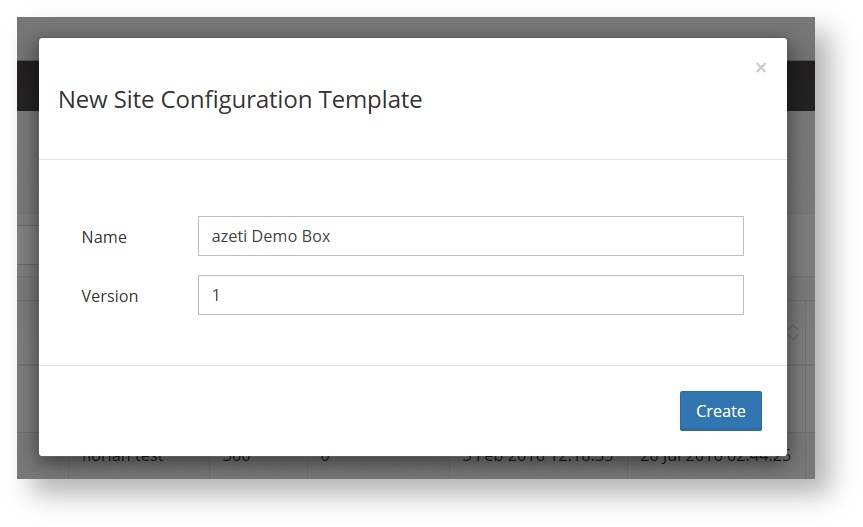
Now we create a new Site Template under Config/Provisioning → Sensor Templates → Site Templates
Info A Component Instance can populate multiple Site Template, whereas a Site Template can only have one Component Instance. If the Component Instance is being changed, the Site Template will be changed accordingly.
- Click Add and give the new Site Template a name. In this example "azeti Demo Box"
- Now Edit the newly created Site Template
- Toggle SU/Normal Mode to gain SuperUser privileges
- Click the blue +Component button and switch to the tab Instances
- Here we will select the Component Instance we have created previously
On the right hand side we select +add all and confirm it with the Ok button at the bottom right
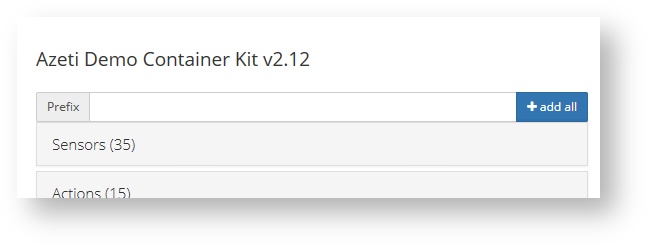
Info In this window it is possible to choose a Prefix name, which can be used to differentiate between multiple sensor or device configurations. These bundled configurations can then again, be removed completely. Very hand for adding a slightly different configuration, while still keeping the old one.
- The Site Template is now ready to deploy
...
| Info | ||
|---|---|---|
| ||
How to deploy a Site Template or if any changes are needed in the Site Template configuration, example How to configure an Action |
Related articles
| Filter by label (Content by label) | ||||||||||||||||||
|---|---|---|---|---|---|---|---|---|---|---|---|---|---|---|---|---|---|---|
|
...