Nexcom NIO100 Setup
This document describes how to install the SiteController image on Nexcom NIO100 (later referred as N100) devices. It also tells how to install or upgrade the SiteController manually.
Installation of SiteController image:
Prepare the installation media to use for image rollout. Use a clean USB flash media for this task (any data on the USB flash media will be deleted in the process!).
- Insert USB flash media into free USB port
- Download Nexcom SiteController installation image
Extract image to USB flash media
Linux:
dd if=usb.img of=/dev/USBSTICK bs=4M

Windows:
Use HDD raw copy tool
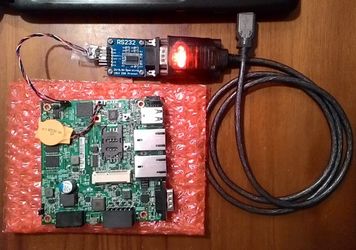
Prepare the device itself by connecting a RS232 TTL level converter to JP4 on N100 board. There is no other way to get a connection via console.
Running the following steps rolls out the SiteController image on N100.
Plugin USB flash device
Power on N100
Connect via Putty (115200, 8N1)
In bootloader (GRUB), select first boot option
Login with default credentials
root / root
Run command
reset_media
Answer all questions with 'yes'
Wait until the job is done
In case of an error like "ERROR: Format partition "/dev/mmcblk0p2" failed!", just reissue steps 6-8.
Device will reboot automatically; Do not remove USB flash media!
After reboot has commenced, login via putty again
Fully shutdown the device
Remove USB flash media
Start the Nexcom N100
Manual setup / update of SiteController
This sections describes how to install or update the SiteController software on N100 manually. This requires SSH access to N100 and a SiteController nightly build installation package.
Copy SiteController nightly build installation package via SSH onto N100
Example using pscp.exe under Windows:
pscp.exe -scp SiteController-install-2015-06-23_Nightly-1170_39fc35d.tar.gz root@192.168.97.35:/tmp/
- Connect to N100 via SSH and change to the directory where your installation file has been saved
Extract the package and change to directory
tar xzf SiteController-install-2015-06-23_Nightly-1170_39fc35d.tar.gz
cd SiteController-install
Run the installation script
./setup.sh
Installation takes up to 20-25 minutes depending on installed hardware and overall system utilization.It is recommended to flush the log file folder before the upgrade or at least clean out logs that are not necessary to save backup time.
# show all logs
ls -lah /mnt/data/azeti/SiteController/log
...
# delete all of the logs
rm /mnt/data/azeti/SiteController/log/*
Edit all necessary config files to setup a connection to azeti SSC
For example:
/opt/azeti/SiteController/SiteController.conf
/opt/azeti/SiteController/config/SiteController.cfg
On the /opt/azeti/SiteController/config/SiteController.cfg make sure that:
The modbus port is configured
[ModbusMasterSettings]
serial_interfaces=/dev/ttyS0
max_error_count=5
max_retry_sleep=10.0
The serial is changed to a unique serial (all installations have the same default serial)
[BaseSettings]
serial=NEXCOM_NIO100
Start the SiteController with its run-script
/opt/azeti/Sitecontroller/run_SiteController.py start