Initial Setup
An Engines Administrator is required to execute some basic steps after the successful installation, before the first sites can be connected and operations begin.
- Open a web browser at http://<IP Address of Docker Host>
The setup wizard will guide you through the creation of the initial Organization and Super Admin User
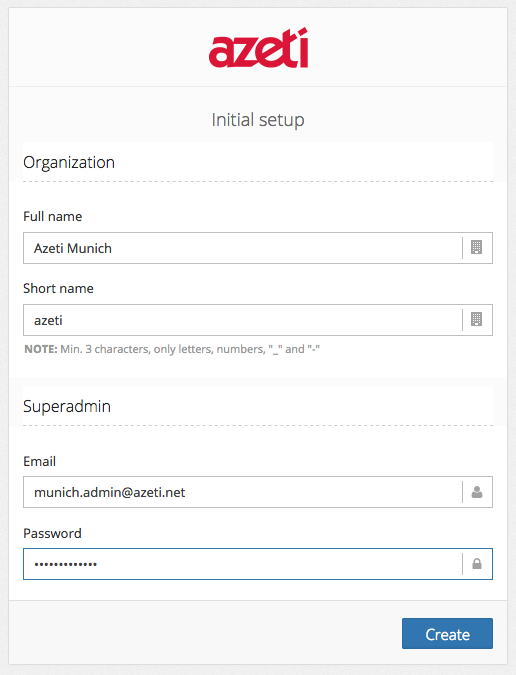
Create a screenshot to memorize the Organization Short Name, Super Admin User and credentials as these are required further on.
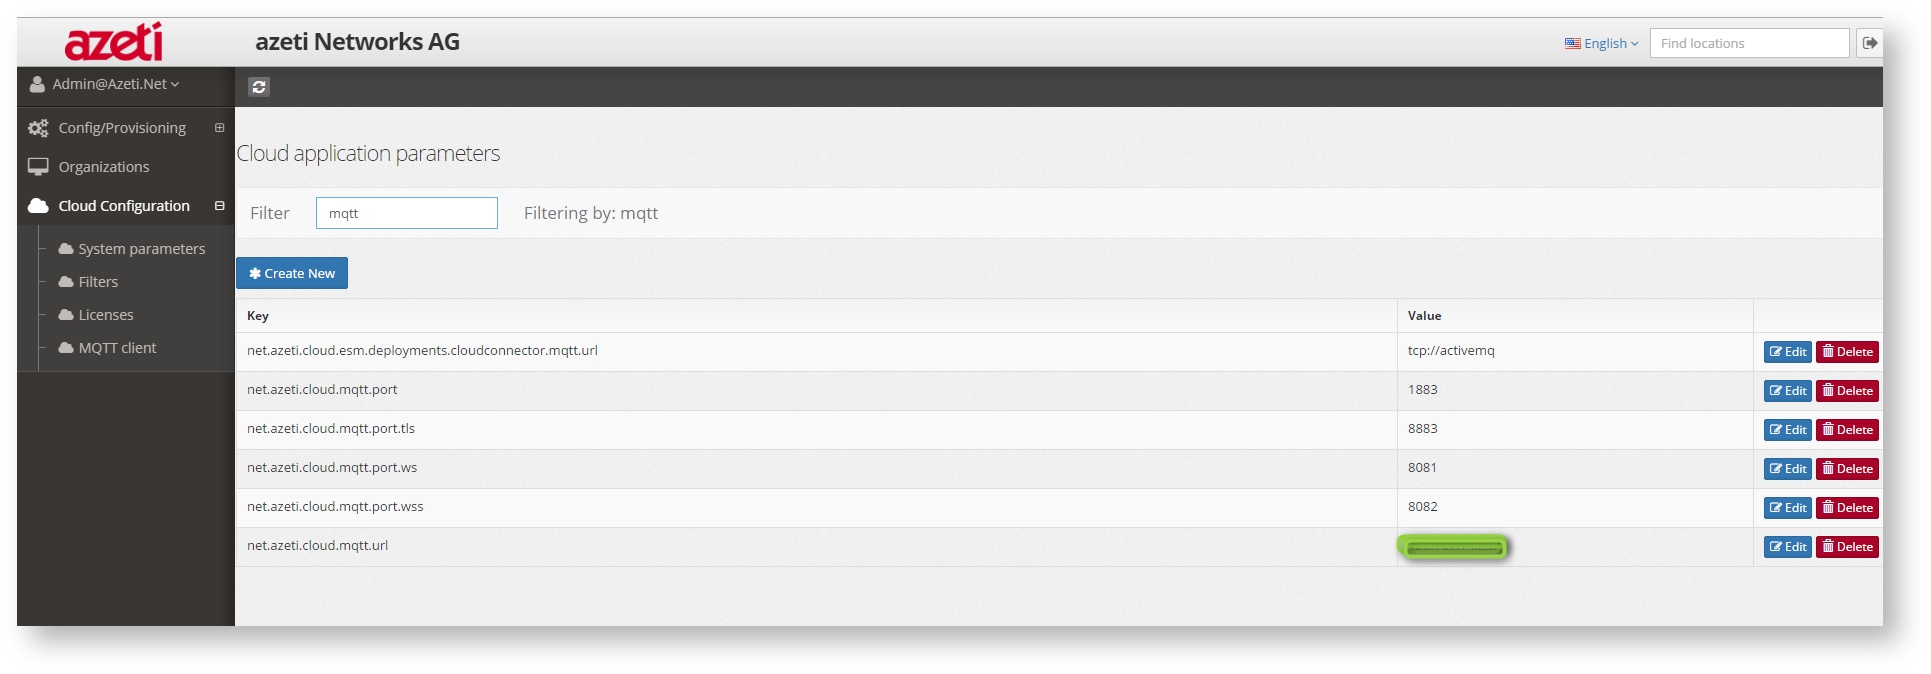
WebSocket Configuration
The Web browser of the clients retrieve data through WebSocket protocol. This requires a server side setting matching the IP address of your new azeti Engine.
- Login to the Control Panel, e.g. http://192.168.207.210/SSCAdminApp#/login (change URL to match your IP address) as Super Admin (user you've created initially).
- Open System Parameters and search for net.azeti.cloud.mqtt.url
- Change the parameter to match your Docker Hosts IP address
License Upload
Fresh installations of the azeti Engine come without a valid license and will not allow to add further sites.
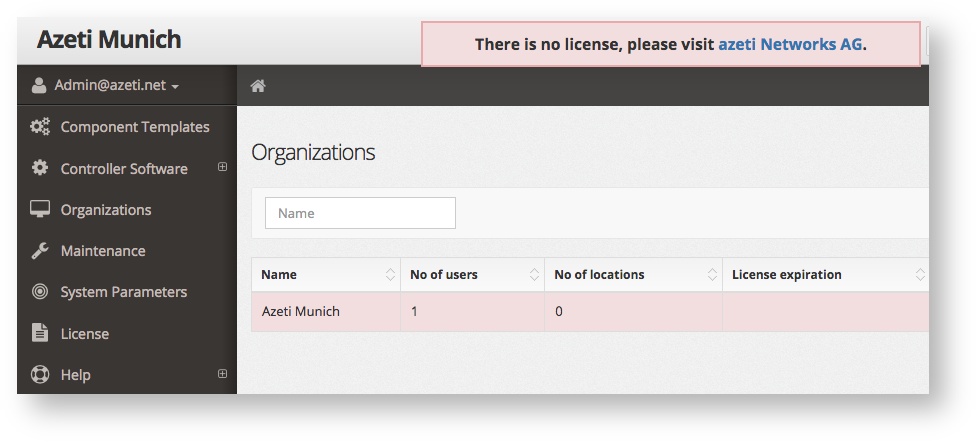
- To upload a license login as Super Admin
- Open License
- Click + Add and enter the license key without any trailing or leading white spaces and blanks.
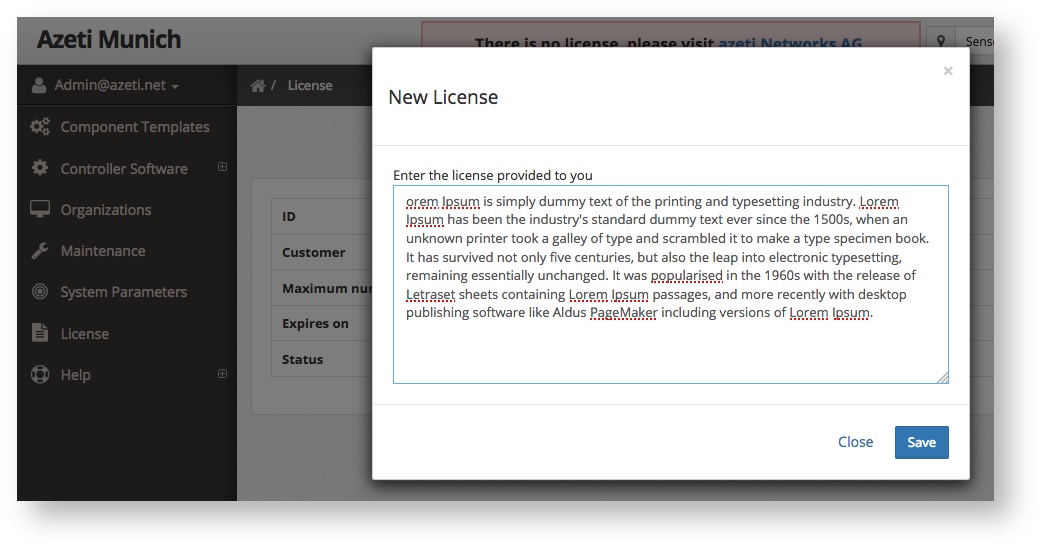
- The License Status will change to OK if everything went good
Site Controller Software Upload
This step is optional but recommended. You can do this at a later stage if you don't have the necessary software package at hand. Template validation inside of the Control Panel requires a version of the Site Controller software you'll be using in your environment. It contains the XSD file required for the validation process.
- Login as Administrator into the Control Panel
- Open Config/Provisioning → Controller Software → Software Packages
- Upload the software package, click + Add
The package will be listed after a successful upload.
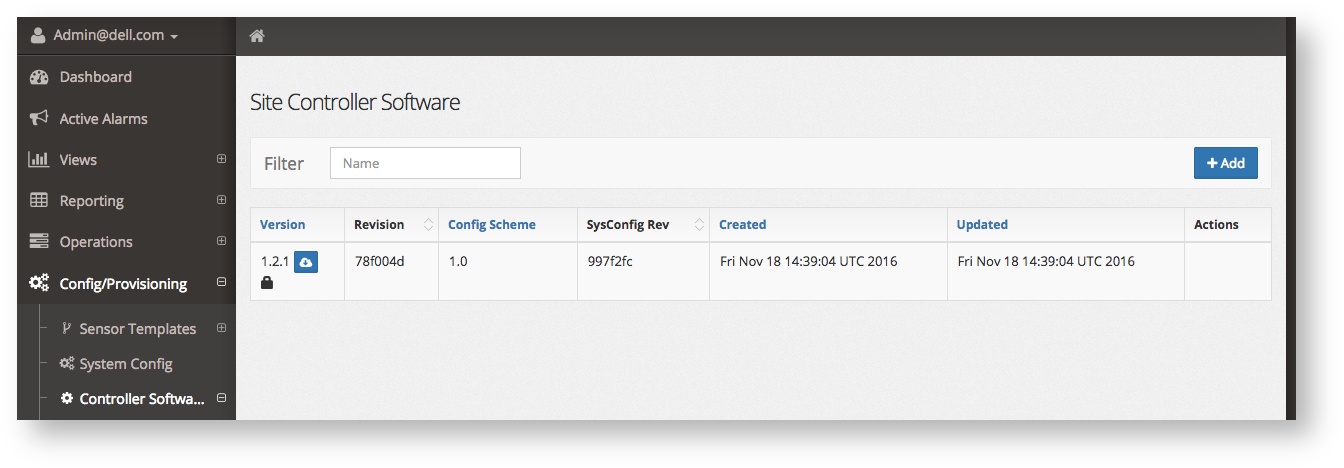
You can download the package at any time by clicking the
 button besides the Version column.