This guide will show how to integrate the alarms from the Azeti Engine to a Cisco Video Surveillance Management server.
| Panel | |
|---|---|
|
Cisco VSOM Configuration
- Login to the VSOM
- Go to Cameras/Templates
- Add a new Template
- Template Type has to be "Generic"
- Associated Location: Choose the location of the camera
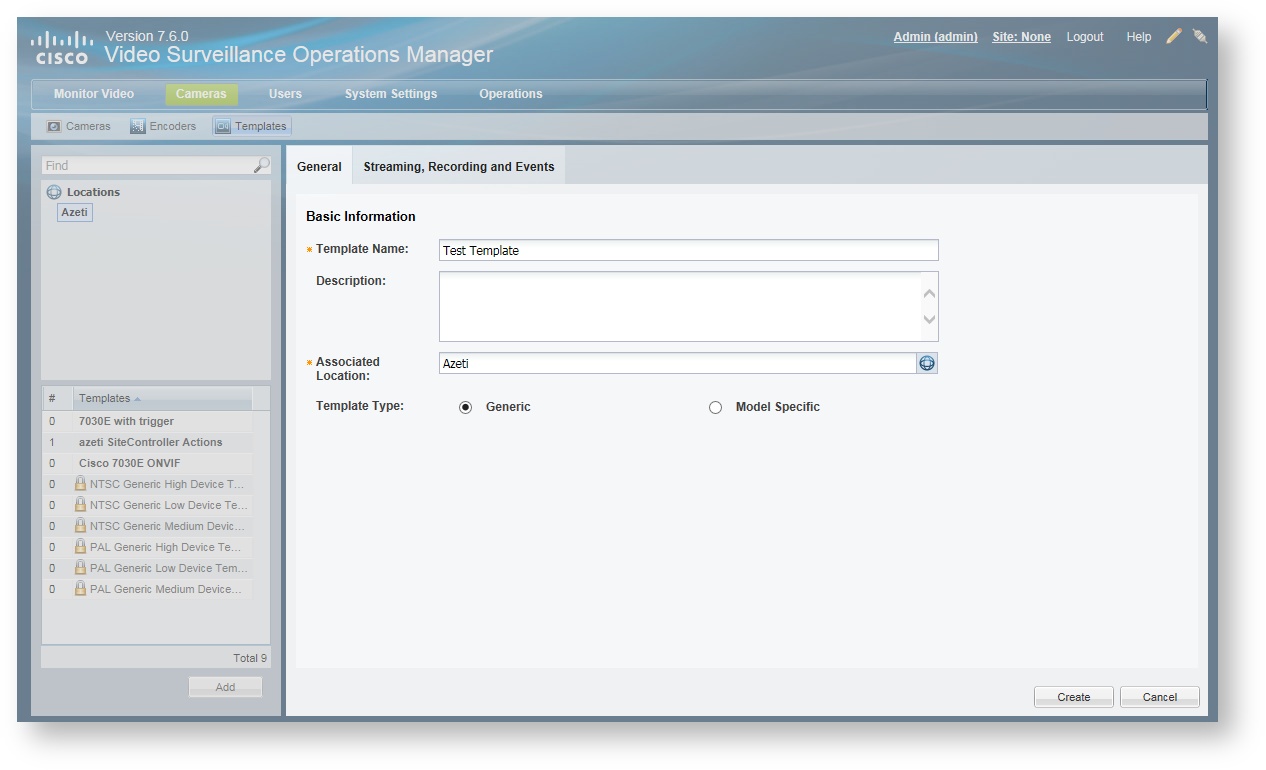
- Go to the "Streaming, Recording and Events" tab.
- Click in "Advanced Events"
- Add a new Event
- Trigger: Soft Trigger
- Custom Event Type: Add
- Name: put the name you want to use. For example "azetiSiteController"
- Trigger Type: Soft Trigger
Add the Subtypes. The subtypes names have to be the same as the sensor id on the Azeti Site Controller that will send the events. Add as many subtypes as sensors.
Warning No more subtypes can be added after that, so make sure that all sensors are there.
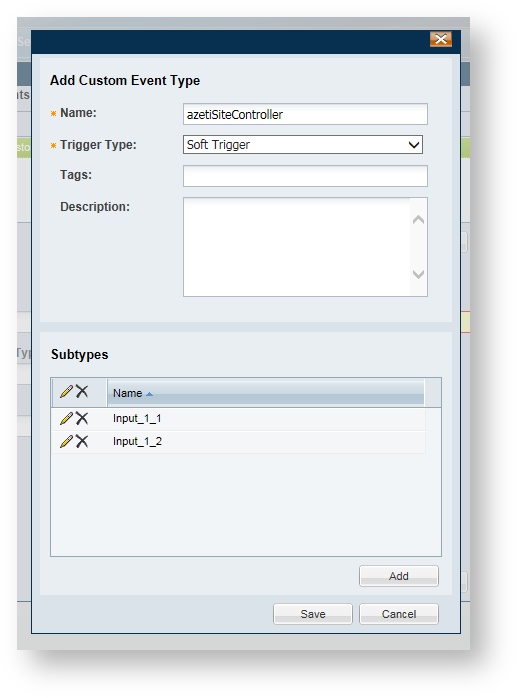
- Save
- Subtype: Select a sensor name of the ones that were just introduced in the custom event type.
- Timeslot: Any
- One-Time Action: Alert
- Repeat and add as many events as sensor are going to be monitored
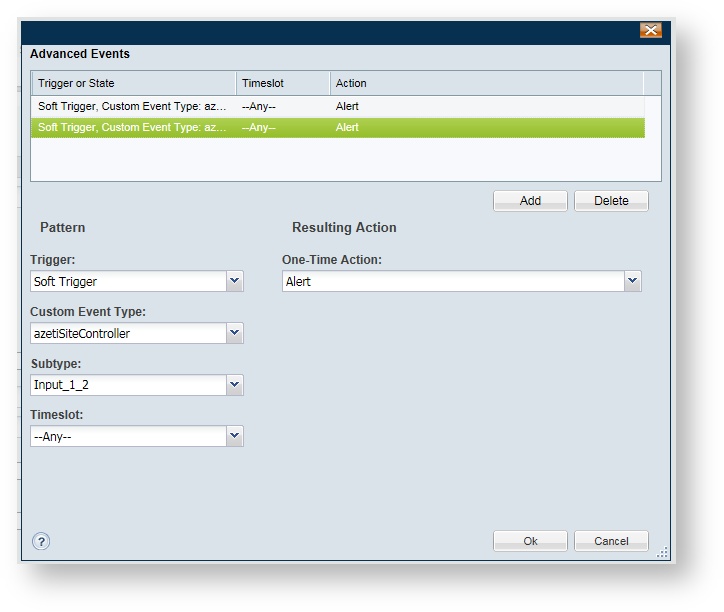
- Click OK
- Click Create
- Go to Cameras/Cameras and select the camera that will have the events associated
- Go to Streaming, Recording and Events
- Click Set Template
- Select the template that was just created

- Save
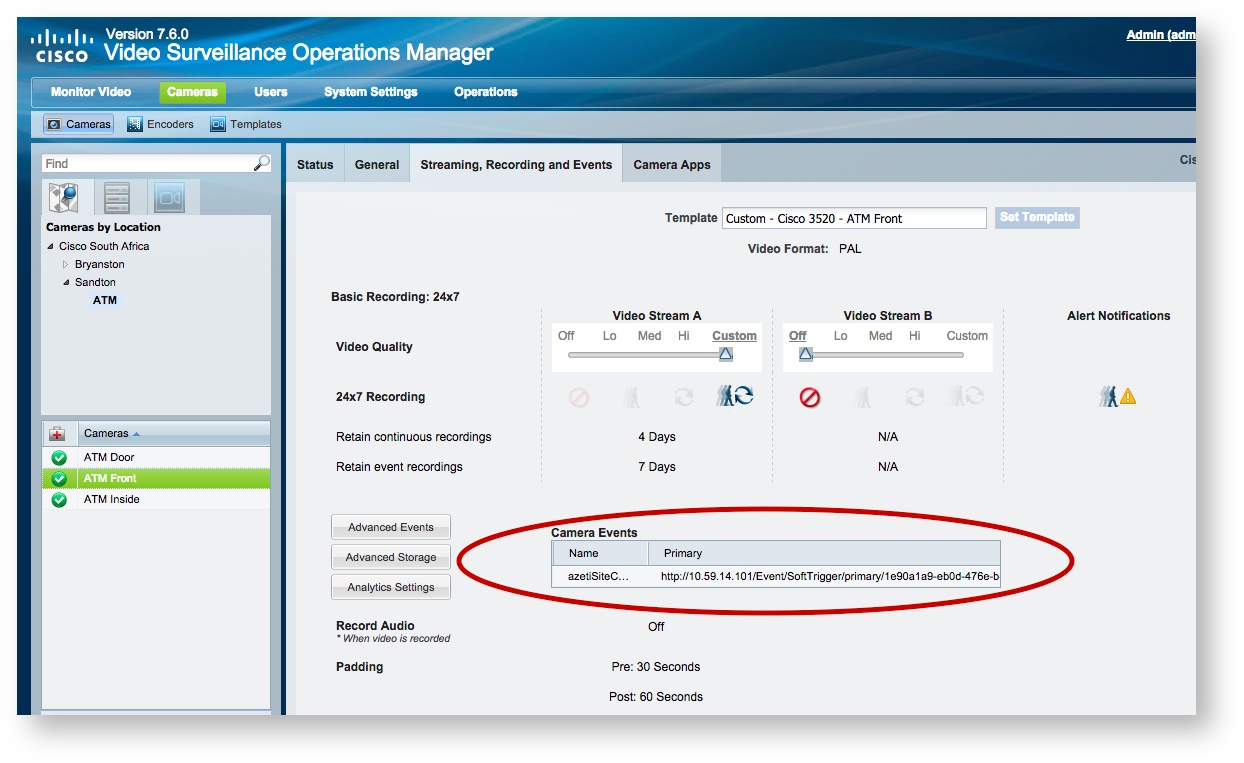
You will now find the required Trigger URL directly in the camera. Choose the camera -> Streaming, Recording and Events and you see the link at the bottom within Camera Events.
| Tip | |||||||
|---|---|---|---|---|---|---|---|
Copy the URL, e.g. http://10.59.14.101/Event/SoftTrigger/primary/1e90a1a9-eb0d-476e-b871-03b420023a96YXpldGlTaXRlQ29udHJvbGxlcg%3D%3D, you can then add your subtype and other meta fields and invoke it in your browser. A successful execution return Status Code 0. With aboves example it would turn out in the URL http://10.59.14.101/Event/SoftTrigger/primary/1e90a1a9-eb0d-476e-b871-03b420023a96YXpldGlTaXRlQ29udHJvbGxlcg%3D%3D?subtype=Vibration%20Alarm with the successful response.
|
Testing the Soft-Trigger Manually
You can test the created soft-trigger manually by invoking the created URL in the browser. It must return a Status Code 0, otherwise there might be an issue.
azeti Cloud Configuration
Login to the Cisco Cloud as the organizations Administrator.
- Go to the My Organization/Notification tab
- Click in Notification Channels
- In the VSOM section fill the URL of the vent, minus the key. For example put http://vsm.azeti.net/Event/SoftTrigger/primary/
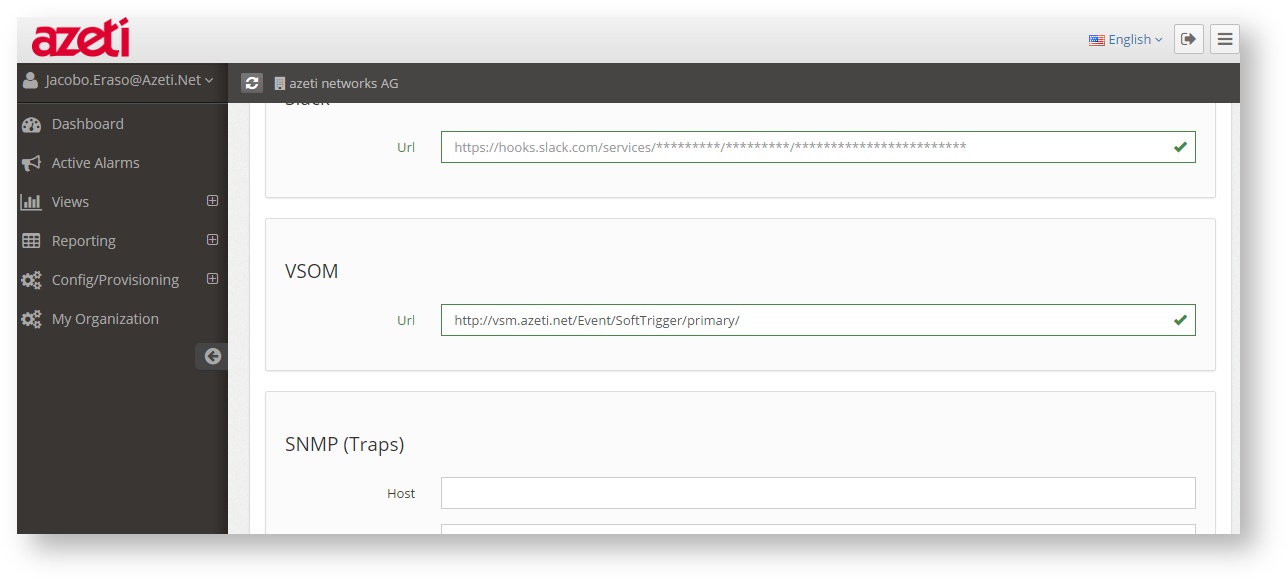
- Save
- In users select the user that will receive the notifications. There needs to be one user, although it will not receive any other kind of notification directly.
- Edit
- Enable the VSOM Notifications

- Save
- Go to Notification/Notification group and add the user to a group. For example Test_Group
- Go to the Site Template of the site that will trigger the events and edit it.
- Click "Toggle SU/Normal mode"
- Select the sensor that will trigger the event (the sensor needs to have a state evaluation, which is what will trigger the event)
- Add the notifications flag to the sensor if is still not present
- Click Notifications
- Select the test group that is going to be used (for example Test_Group)
- In severities select at least 100 using the sliding bar

- In Timing select a time period (if no time period is present one should be created in the Config/Time Periods section)
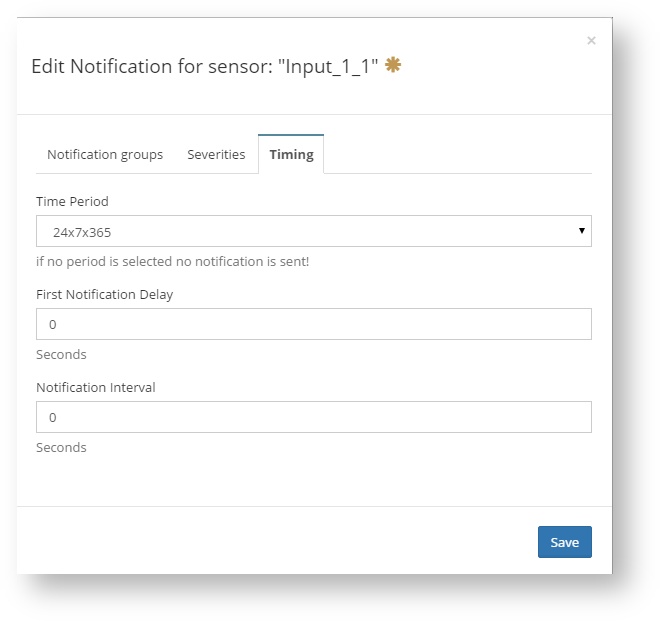
- Save
- Click "Set New Parameter" and select "VSOM url"
- A new section called "sensor._srv_vsom_url.value" will be created in the sensor. It should be filled with the key that was created in the VSOM. For example "d97b0f48-d6f1-4105-a296-28432ead0267YXpldGlTaXRlQ29udHJvbGxlcg%3D%3D"
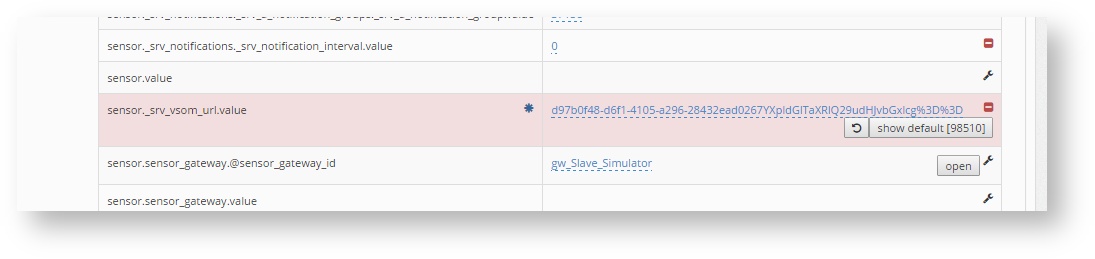
- Click the button back
- After this the notifications and VSOM events should work. Severy 100 events are sent as warning and 200 as critical. There is no need to redeploy the configuration to the site, as this elements only affect the server.
| Info |
|---|
Related articles
| Filter by label (Content by label) | ||||||||||||||||||
|---|---|---|---|---|---|---|---|---|---|---|---|---|---|---|---|---|---|---|
|
| Page Properties | ||
|---|---|---|
| ||
|