SONARPLEX System
In the "System" section you can save and restore the configuration of the SONARPLEX appliance as well as install the patches / hotfixes or update the device software.
Backup
Open the Administration Web Interface > System > Backup => the following screens opens.
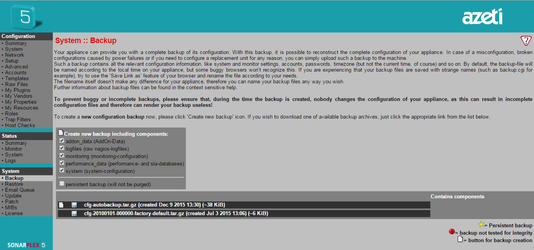
In this menu you can create a backup or download an existing one. A list of available Backup is displayed on the undermost part. Click on any backup to save the file on an external hard drive. The suggested file name contains the System ID (SysID) of the SONARPLEX appliance as well as the "smlp" acronyms to indicate the contained components:
- s = system (system configuration)
- m = monitoring (monitoring configuration)
- l = log files (raw Nagios log files)
- p = performance_data (performance and SLA databases).
To create a new backup, proceed as described here.
- Since the firmware version 2.6.4 onwards the SONARPLEX appliance automatically creates a backup after every reboot of the appliance. This can only work if the SONARPLEX appliance is properly configured (see Administration Web Interface > Configuration > System > Backup Configuration).
- Persistent backup are permanent backup and cannot be deleted.
Autobackup archive cfg-autobackup.tar.gz has special purpose: It gets automatically created by system based on defined schedule (see Administration Web Interface > Configuration > System > Backup Configuration) in order to be primarily used for high availability service mode. This mode is based on exchanging autobackup archive and rolling it out by slave for substituting master appliance's functionality and its recent data. You can click on  to explicitly refresh autobackup archive with recent changes between two subsequent automatic creation turns.
At the end of the list, there is always the following entry: cfg-xxxxxxxx-xxxxxx-factory-default.tar.gz. With this entry you can restore the delivery state of the SONARPLEX appliance in the "Restore" menu. (see below)
Restore
This menu allows to restore backups.
Open the Administration Web Interface > System > Restore => the following screens opens.
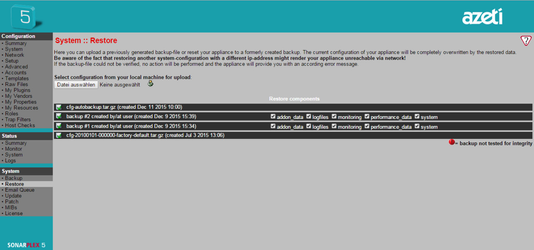
The available backups are shown in a list. The maximum number displayed is 10.
There are two to restore a backup:
- Restore an available backup
- Restore an external backup
To restore an available backup, proceed as follows:
- If included, enable the check boxes of the components to be restored with the respective backup in the "Restore components" column. (see picture above)
- Click on
 to apply the selected configuration archive. The SONARPLEX appliance will reboot after loading the backup file. This will take approx. 60 seconds.
To restore a backup file from an external hard drive, proceed as follows:
- Click the “Search” button (Datei auswählen) => an 'open file' dialog will open.
- Select the file you want to restore and click on "OK".
- Click on
 to load up selected file.
With this function it is also possible to restore backups of other SONARPLEX appliances.
At the end of the list, there is always the following entry: cfg-xxxxxxxx-xxxxxx-factory-default.tar.gz. With this entry you can restore the delivery state of the SONARPLEX appliance. The flash memory of the SONARPLEX appliance is deleted. The IP address of the SONARPLEX appliance as well as the IP addresses of DNS server and gateway are preserved. This way you can access them via the IP address immediately after the SONARPLEX appliance was rebooted.
Email Queue
Open the Administration Web Interface > System > Email Queue => the following screens opens.
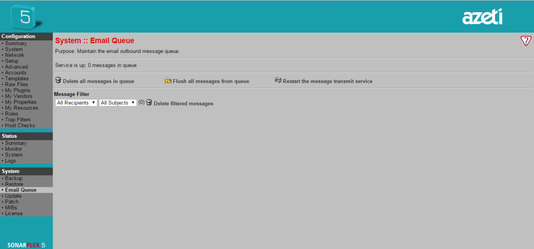
This menu is for the maintenance of the email outbound message queue if any issues regarding the delivery of notifications by email occur. The page shows whether the email service is running and the amount of messages in queue waiting for delivery.
Click on  to empty the entire outbound queue. All messages will be lost! This operation may take a while.
Click on  to force the email service to send all messages in queue.
Click on  to start or restart the email service.
The part “Message Filter” can be used to select specific messages for deletion. By default the entire queue is selected. The messages can be filtered by Recipient and Subject by using both drop down boxes. The filtered messages can be deleted entirely by clicking on . This operation may take a while.
If problems occur with unsent notifications by email (raising email message queue) please crosscheck the SMTP Configuration as well as the email addresses in Contacts.
Update
This menu is used to install Firmware-image and should be done all 3-4 months.
Open the Administration Web Interface > System > Update => the following screens opens.
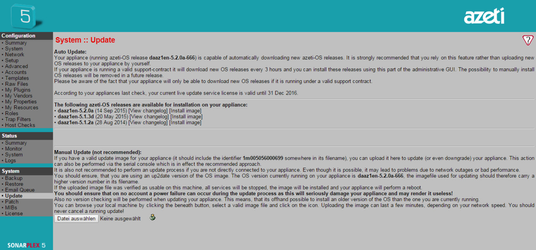
As you see in the picture above, there are 2 ways to update the versions of the azeti SONARPLEX software on your SONARPLEX appliance.
- Auto Update
- Manual Update
If the automatic update function is enabled (see Administration Web Interface > Configuration > System > Autoupdates), proceed as follows to update the device software of your SONARPLEX appliance:
- Before updating, reboot the SONARPLEX appliance (see Summary).
- Choose a device software from the list of available auto-update files and click the "Install image" entry => the update is performed. Afterwards, the SONARPLEX appliance reboots. You can also click on “View changelog” to view the change log.
To manually update the device software of your SONARPLEX appliance, proceed as follows:
Download the update for your SONARPLEX appliance from the Internet. Call the azeti web portal.
Make sure that you install the correct device software for your SONARPLEX appliance. A wrong device software or one that is not released for your SONARPLEX appliance can destroy the appliance.
- Before updating, reboot the SONARPLEX appliance (see ).
- Click the "Search" button (Datei auswählen) to select the updatefile => an 'open file' dialog opens.
Select the file and click on "OK".
Then click on
to upload the selected file => the update is performed. Afterwards, the SONARPLEX appliance reboots.
Only use the internet browser Mozilla Firefox to update the software of your SONARPLEX appliance. The size of the update files can cause problems when using the Internet Explorer.
Patch
In this menu you can install patches / hotfixes for your azeti SONARPLEX appliance. There can only be installed one patch on the SONARPLEX appliance. If you install a new patch, an already existing patch is deleted.
Open the Administration Web Interface > System > Patch => the following screens opens.
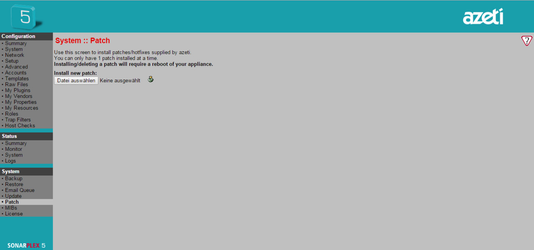
To install a patch for your SONARPLEX appliance, proceed as follows:
- Click the "Search" button (Datei auswählen) to select the patch file => an 'open file' dialog opens.
- Select the file and click on "OK".
- Then click on to upload the selected file.
The patch is being installed afterwards, the SONARPLEX appliance reboots.
Optionally, you can remove an installed patch by clicking on .
A patch belongs always to a specific image, which should run at the appliance. If the patch does not correspond to the installed image it will be removed with the next start of the SONARPLEX system.
A valid patch file remains installed until it gets replaced by another patch or it gets removed using this page System::Patch. To delete a patch use the trash icon in the lower right corner of this page.
Patches are supplied by azeti. The name of a patch file should have the following structure: update-<image number>-<patch ID>.tar
MIBs
Open the Administration Web Interface > System > MIBs => the following screens opens.
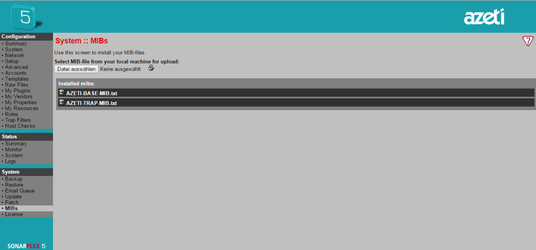
To install a MIB file on your SONARPLEX appliance, proceed as follows:
- Click the "Search" button (Datei auswählen) to select the MIB file => an 'open file' dialog opens.
- Select the file and click on "OK".
- Then click on to upload selected file => The MIB file is uploaded to your SONARPLEX Appliance and is subsequently installed.
License
This menu shows the license number and the maximum number of monitorable hosts.
Open the Administration Web Interface > System > License => the following screens opens.
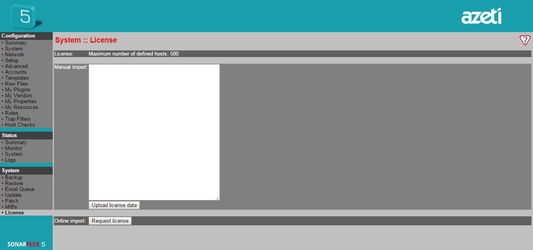
Manual import: Click on "Upload license data" to import a new license.
Online import: Click on "Request License" to download your license data from the azeti Feature Server.
If you are using the SONARPLEX VAA Freeware: Please provide the required information and click on "Request demo license" to request a demo license.
- style