Accounts
In this menu you can administer the user (contacts, who are created in the menu “Setup”) and administrator rights. You can for example define if they are access to Administration Web Interface or User Web Interface and what they can view.
For defining the rights of the user accounts, proceed as follows:
- Open the Administration Web Interface > Configuration > Accounts and select a user (see picture below).
- Enter your settings, which are described in the table below.
Click on
 to save your changes.
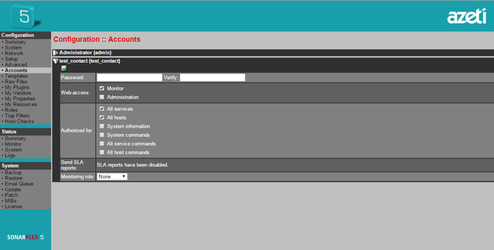
Setting Description Password Enter a new password for the selected user and verify it in the “Verify” textbox. Web-access Allow the selected user to access the monitoring or administration web interface by enabling the corresponding checkbox. Authorized for Allow the selected user additional rights for the monitoring web interface.
Please note that the checkbox System Information is also used to display/hide User Web Interface menu items, for example in problems outages, histogram reports, alert history, summary reports, notifications, event logs or status information
Send SLA reports Enable sending of weekly and/or monthly e-mail reports in html- and/or csv-format regarding the status of services/hosts to the selected user.
Make sure that a valid e-mail address is stored for the selected user account. You can edit the e-mail address in How-To Create or Edit a contact.
Monitoring role Assign a pre-defined role to an account in order to limit this account's monitoring web interface view.
Please note that the selected user has to be a member of the contact group assigned to the respective service or host.
- style